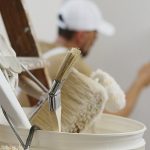
Successful Basement Painting
What Not to Do
Do you feel that urge to refresh your basement’s ambiance with a new coat of paint?
Tackling the project can transform a drab storage space into a vibrant living area, yet it’s not without its pitfalls.
From the crucial steps of prepping your surfaces to understanding the role of lighting in revealing the proper hues, painting your basement is riddled with potential missteps.
In this article, we’ll unveil the common blunders that could derail your basement painting project, helping you navigate through them with the confidence of a seasoned painter.
Keep reading to ensure your basement’s transformation is nothing short of successful.
Skipping Surface Preparation Steps Is a Big Mistake
Embarking on a basement makeover can ignite a burst of enthusiasm, but it’s my responsibility to caution you against rushing headlong into painting without proper surface prep.
As a seasoned professional painting contractor, I’ve honed my craft through years of experience. I’ve learned that skirting around proper preparation is a pitfall that can turn a promising painting project sour. My expertise and experience are at your disposal to guide you through this process.
Whether tackling dampness with targeted treatments like [applying a waterproofing sealant] or dedicating time to cleaning and sanding the walls for that flawless finish, remember that the devil is in the details.
Let’s talk frankly about what happens when you bypass these critical steps and how to avoid these common traps.
Avoid Painting Over Damp Walls Without Treating Them First
Transforming the ambiance of your basement starts with addressing moisture issues; it’s a step I always pay attention to. Ignoring the presence of dampness before laying down a new coat of paint invites various matters, from peeling to mold growth. As someone who takes pride in delivering professional painting services, I always insist on a thorough evaluation and appropriate treatment of wet areas before applying a single brushstroke. This might involve [using a dehumidifier to reduce moisture levels, applying a waterproofing sealant to prevent water penetration, or repairing any leaks or cracks in the walls].
Never Forget to Clean and Smooth the Walls for Even Application
Approaching the basement walls, I always remind my clients that a pristine surface is pivotal for a uniform application. Prioritizing the cleaning and smoothing of walls is non-negotiable; it eradicates grime and fills in the nicks and scraps that life has etched into them, ensuring the new paint adheres properly and presents with elegance. Neglecting this step can lead to issues like [uneven paint application and visible imperfections], detracting from the overall finish.
Choosing the Wrong Type of Paint Can Ruin Your Project
Amidst the labyrinth of decisions that arise during a basement painting expedition, selecting the suitable type of paint is paramount.
My years as a professional painting contractor have taught me that using exterior paint for interior basement walls is a blunder that can have lasting repercussions on aesthetics and longevity. Exterior paint, designed to withstand outdoor elements, can lead to issues like [peeling and discoloration] when used indoors.
Equally critical is my choice of moisture-resistant paint formulated explicitly for basements. This type of paint, such as [acrylic latex paint or epoxy paint], is designed to withstand the damp conditions often found in basements, preventing issues like [peeling, cracking, or mold growth].
Steering clear of these mishaps isn’t just best practice; it’s a commitment to the integrity of the project and the satisfaction of my clients. By following these guidelines, you can feel confident in achieving a successful basement transformation.
Do Not Use Exterior Paint Types for Interior Basement Walls
As a dedicated painting contractor, I’ve seen the unfortunate aftermath when interior basement walls are treated with an exterior paint solution. The unique texture and chemical composition of exterior paints could be better suited for the controlled environments found within our homes; they can result in a subpar finish that neither endures nor complements the interior aesthetic we strive for. I emphasize to my clients the importance of using a product formulated for interior use, specifically designed to cope with indoor conditions and to deliver a durable and visually pleasing result.
Selecting Non-Moisture-Resistant Paint in Basements Is a Misstep
I cannot stress enough the folly of reaching for just any paint can when sprucing up a basement. A slip-up that often rears its head is grabbing paint that isn’t moisture-resistant, forgetting that basements are prone to humidity and damp conditions. Based on years of delivering professional painting services, my advice is unequivocally to select a paint built to withstand this environment, ensuring the longevity and beauty of your finish.
Ignoring Ventilation While Painting Could Be Hazardous
Once we’re past the prep work and the right paint has been carefully selected, avoiding getting caught up in the momentum and overlooking the air we breathe is pivotal.
Painting a basement without a keen eye on ventilation is a red flag I often alert my clients to.
Importing fresh air through the strategic use of fans or the simple act of opening windows is not just about comfort but safety. Fans can help [circulate air and disperse fumes]. In contrast, open windows allow for [the exchange of stale indoor air with fresh outdoor air]. This can help prevent issues like [headaches, dizziness, or nausea from inhaling paint fumes].
Fumes and odors can become health hazards if improperly managed, lingering like unwanted guests long after the paint drains.
I ensure adequate airflow throughout the painting process, protecting both the well-being of my team and the client’s household.
Failing to Provide Adequate Airflow During the Painting Process
Throughout my extensive experience as a painting contractor, I’ve emphasized to my crew and clients that proper ventilation is non-negotiable during any painting endeavor, especially in closed spaces like basements. Skimping on ventilation can lead to a build-up of toxic fumes, compromising the immediate health of everyone involved and potentially affecting indoor air quality in the long term. As a steadfast practitioner of safe painting practices, I champion the necessity of maintaining a fresh, breathable workspace as we transform drab basements into vibrant living areas. This is particularly important because [paint fumes can cause dizziness, headaches, and nausea if inhaled in high concentrations].
Neglecting to Use Fans or Open Windows Can Trap Fumes and Odors
As a professional painting contractor, I advise basement transformations and consistently advocate for maintaining a ventilated environment. It’s essential to acknowledge that neglecting to use fans or open windows can trap potentially harmful fumes and odors, turning your new basement oasis into a health hazard. Evasion of this simple yet pivotal step can overshadow the outcome with a lingering, negative impact on air quality.
| Task | Importance | Action |
|---|---|---|
| Ventilation During Painting | High | Utilize fans, open windows |
| Health Hazard Prevention | Critical | Ensure continuous airflow |
| Air Quality Maintenance | Essential | Monitor environment, adjust as needed |
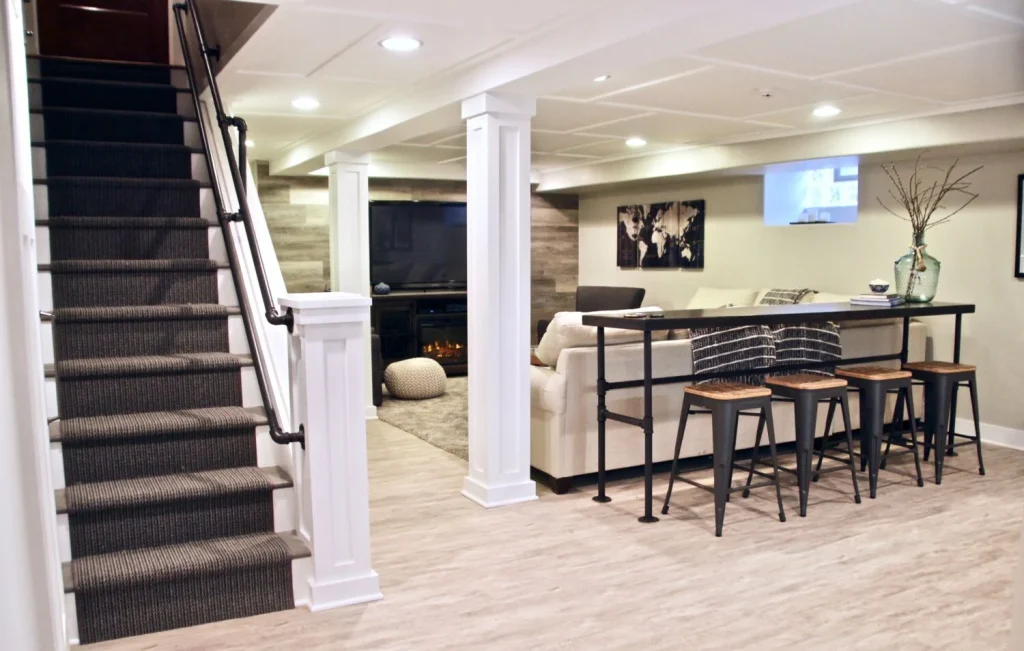
Overlooking Lighting Conditions Affects Paint Color Choice
When I approach a basement painting project, I often observe clients swept away by swatches of colors that they envision will transform their space.
However, an aspect frequently missed is the peculiar interplay of light within a basement, which can vastly affect the perceived color of the walls.
Natural light is scarce in these lower levels of a home, and how artificial lighting interacts with your chosen hues can make or break the desired ambiance.
Considering these lighting conditions is crucial, as the wrong color choice can result in a finished project that feels far removed from your initial vision. For instance, a vibrant color under artificial light might appear dull and lifeless in natural light or vice versa. Understanding how your chosen color will interact with the available light sources is key to achieving the desired ambiance.
Choosing Colors Without Considering Basement’s Natural Light
In my consultations, I commonly address the homeowner’s oversight in evaluating the basement’s unique lighting environment when deciding on paint colors. The basement’s absence of natural light compared to other areas of the home necessitates careful reflection on how color choices will interact with available lighting sources, and I often suggest conducting color tests under the actual basement lights to ensure the hue resonates with the homeowner’s expectations once applied to the walls.
Not Testing Paint Samples Under Artificial Basement Lighting
Mentoring clients through the nuances of basement renovations, I often find that the casual dismissal of artificial lighting’s influence on paint colors leads to unforeseen disappointments. It’s always startling to witness how a shade that appeared perfect in the store under their commercial lighting can morph into an entirely different character in the diffuse glow of a basement’s recessed LEDs or classic lightbulbs. Therefore, I always recommend live testing paint samples in situ, for the basement’s light will ultimately vote on your color’s actual appearance in your home.
- Assess the specific type of artificial lighting in your basement.
- Apply sample paint swatches onto the basement walls or large boards that can move around the space.
- Observe the paint samples at different times of the day and under various lighting scenarios to capture the full spectrum of the color’s potential transformation.
Applying Paint Too Quickly Leads to Longer Drying Times
Now, let’s discuss a common misstep that often goes unnoticed in the haste to transform a basement—applying paint too quickly.
Clients sometimes approach this step with a sense of impatience, eager to see the final product, but I must emphasize the importance of restraint.
Ignoring the golden rule of allowing adequate drying time between coats can lead to unsightly smudges and blemishes in the paintwork, undermining the smooth, professional finish we aim for.
Equally important is how the paint is applied; a trend towards heavy-handed, thick layers may seem like a time-saver, but it inadvertently prolongs the drying process and, thus, the overall completion time of your painting project.
Addressing these two points can mean distinguishing between a polished, enduring finish and one marred by avoidable mistakes.
Rushing Through Coats Without Proper Drying Time Causes Smudges
In all my years as a professional painting contractor, I’ve consistently noticed that impatience during the painting process can be detrimental. Applying subsequent coats without letting the previous layer fully dry almost invariably leads to a compromised finish, with smudges and smears marring a surface where smoothness should prevail. It’s a lesson steeped in the value of patience: giving the paint the time it needs to set is not just a recommendation; it’s an essential step in achieving the high-quality result my clients expect and deserve.
Layering Thick Coats Instead of Several Thin Ones Extends Drying
As a professional who has seen many seemingly minor decisions affect the quality of a basement painting job, I’ve observed that one substantial error is layering on thick coats of paint to speed up the process. Contrary to common belief, this technique does not save time; it lengthens the drying process significantly, increasing the likelihood of a tacky, uneven finish that can detract from the room’s overall appearance.
- Applying thick coats of paint may seem efficient, but it leads to extended drying times and potential tackiness.
- Thick layers hamper the achievement of a smooth, even finish and create a risk for runs and drips.
- Patience with multiple thin coats rewards you with a more refined, professional-looking surface.
A successful basement painting project hinges on preparation, from treating damp walls to ensuring surfaces are clean and smooth for even paint application.
Choosing the correct type of moisture-resistant paint and considering the basement’s unique lighting can profoundly affect the appearance and longevity of your paint job.
Adequate ventilation is essential for safety during painting, and patience with drying times ensures a smooth, professional finish.
By avoiding these common pitfalls, you’ll be well on your way to a beautifully transformed basement that will stand the test of time.
Avoiding common pitfalls makes achieving a flawless basement painting project in Aledo, Benbrook, Fort Worth, South Hills, and Wedgewood easy. Stellar Painting provides expert guidance to ensure your space is beautifully transformed. Trust our professional team for impeccable results and a seamless painting experience. Choose Stellar Painting for your next basement makeover.