Transforming Your Home’s Exterior
Introduction
Brick is a timeless and durable material commonly found in many homes. While it offers a classic and charming appeal, there may come a time when you desire a fresh look for your home’s exterior. Painting brick can be a transformative solution that breathes new life into your property, enhancing its curb appeal and making a lasting impression. In this blog, we will delve into the art of painting brick, discussing the benefits, considerations, and step-by-step process involved. Whether you want to update outdated brick or revitalize the appearance of your home, this guide will provide valuable insights to help you achieve stunning results.
The Benefits of Painting Brick
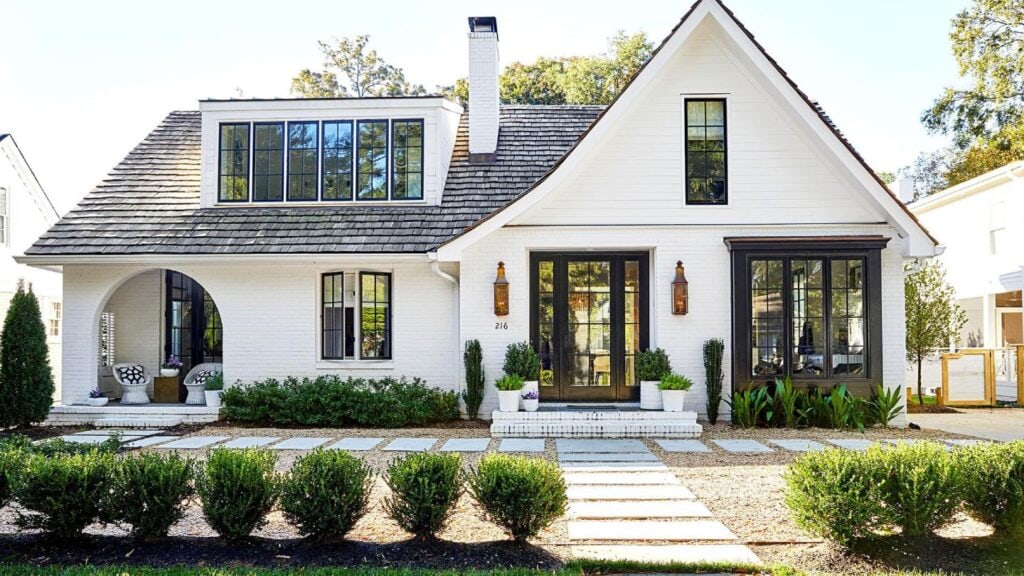
Painting brick offers numerous benefits for your home’s exterior. Firstly, it allows you to change the color and appearance of your brick, providing you with the flexibility to match your personal style or the overall aesthetic of your neighborhood. Whether you prefer a clean, contemporary look or a rustic, traditional feel, painting brick can help you achieve your desired visual impact. Additionally, painting brick provides protection against weather elements, such as rain, wind, and UV rays, which can deteriorate the brick’s surface over time. It also seals the porous nature of brick, preventing moisture penetration and reducing the risk of mold or mildew growth. Lastly, painted brick requires less maintenance compared to unpainted brick, as it eliminates the need for frequent cleaning and repointing.
Considerations Before Painting Brick
Before diving into the painting process, there are several considerations to keep in mind. Firstly, assess the condition of your brick. Ensure that it is structurally sound and free from any damage or significant deterioration. If there are any cracks or loose mortar, it’s crucial to address these issues before proceeding with the painting project. Also, make sure that you do not paint any brick house built before the 1940s. Brick back then was made to breathe and painting it can cause some serious issues down the road! Next, evaluate the style and architecture of your home. Painting brick can significantly alter its appearance, so choose a color and finish that complement the overall design. Take into account the surrounding landscape, neighboring houses, and any homeowner association guidelines that may impact your color choices. Additionally, consider the climate in your area. Certain paint types and application methods may be more suitable for extreme weather conditions. It’s important to select paints and primers that offer excellent durability and resistance to fading, cracking, and peeling. Lastly, check local regulations or homeowners’ association guidelines to ensure there are no restrictions on painting brick in your neighborhood.
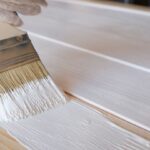
The Step-by-Step Guide to Painting Brick
Step 1: Prepare the Surface
Before painting, it’s essential to prepare the brick surface properly. Start by thoroughly cleaning the brick using a stiff brush or a power washer to remove dirt, debris, and any loose paint or mortar. Pay close attention to the mortar joints, ensuring they are clean and free from any loose or crumbling material. If there are any stubborn stains or discolorations, you may need to use a mild detergent or a brick cleaning solution. Rinse the surface thoroughly and allow it to dry completely before proceeding to the next step.
Step 2: Repair Any Damages
Inspect the brick for any damages, such as cracks or spalling. If you find any issues, it’s crucial to address them before painting. Use a suitable brick repair product or mortar mix to fill in the cracks and repair any damaged areas. Allow the repairs to dry and cure according to the manufacturer’s instructions.
Step 3: Apply Primer
Applying a high-quality primer specifically designed for masonry surfaces is essential to ensure proper adhesion and long-lasting results. Choose a primer that is compatible with the type of paint you will be using. Use a brush or a roller to apply the primer evenly over the entire brick surface, working in small sections. Pay extra attention to the mortar joints to ensure they are well-covered.
Step 4: Select and Apply Paint
When it comes to selecting the right paint for your brick, opt for a high-quality exterior paint that is specifically formulated for masonry surfaces. Consider factors such as the color, finish, and sheen that align with your desired outcome. It’s advisable to choose lighter colors for brick as they reflect heat better and are less prone to fading. Use a brush or a roller to apply the paint, working in small sections and ensuring an even and consistent coverage. Allow the paint to dry between coats as per the manufacturer’s instructions.
Step 5: Finishing Touches
Once the paint has dried completely, inspect the painted surface for any touch-ups or areas that may need additional attention. Use a small brush to carefully touch up any missed spots or imperfections. Ensure that the paint is fully cured before subjecting it to any harsh weather conditions or cleaning.
Conclusion
Painting brick can be a transformative process that adds visual appeal and value to your home’s exterior. By carefully considering the benefits, preparing the surface, choosing the right products, and following a step-by-step approach, you can achieve stunning results that will enhance your home’s curb appeal and make a lasting impression. Remember to consult with a professional painting contractor if you’re unsure about any aspect of the process or if you have a large-scale project that requires expertise. Whether you want to update the look of outdated brick or revitalize the appearance of your home, painting brick can be a rewarding endeavor that transforms your property into a beautiful and welcoming space.