Safety Steps for Stripping Wall Paint
Stripping wall paint is like unraveling a mystery hidden in layers, each one whispering tales of past hues and homeowner decisions. Yet, diving into this task without the right know-how can turn your DIY dream into a hazardous nightmare.
Safety isn’t just another step; it’s the entire staircase when dealing with chemical strippers or dust-filled air. You’ll learn how to set up your workspace like a pro—think open windows and covered furniture—and gear up with must-have personal protective equipment (PPE). And if those harsh chemicals make you uneasy, we’ve got some nifty alternatives that might do the trick.
Towards the end, don’t worry—we won’t leave you hanging on waste disposal or what to do during an oops moment with chemicals. By sticking around here, you’re ensuring that your project ends with pride in accomplishment rather than concern for safety slips.
Table Of Contents:
- Understanding the Risks of Stripping Wall Paint
- Preparing Your Workspace for Paint Stripping
- Choosing the Right Personal Protective Equipment (PPE)
- Safe Use of Chemical Paint Strippers
- Alternatives to Chemical Paint Strippers
- Proper Disposal of Paint Waste
- Emergency Procedures for Accidental Exposure
- Maintaining Safety Throughout the Project
- FAQs in Relation to Safety Steps for Stripping Wall Paint
Understanding the Risks of Stripping Wall Paint
When you’re ready to give your walls a fresh start, stripping old paint is like preparing a canvas for a masterpiece. But it’s not all smooth strokes and perfect finishes; this task can bring some serious hazards into your living room or workspace if you’re not careful.
Say goodbye to the days when we thought lead-based paints were our friends. We now know that these heavy metals are more like frenemies—seemingly harmless until they show their true colors with risks of toxicity. It’s critical to recognize that exposure to such substances during paint removal can cause health problems ranging from headaches and dizziness to long-term cognitive issues, especially in children and pregnant women.
Dust isn’t just what gathers on your coffee table—it becomes an airborne adversary when sanding down surfaces. This seemingly innocent byproduct of hard work can be laced with chemicals from older layers of paint, turning each breath into a potential health hazard.
Fumes aren’t any better—they’re invisible but pack quite the punch when chemical strippers are in play. The noxious odors are enough warning that ventilation isn’t just about keeping cool; it’s essential for keeping the lungs clear too. Think about those labels on chemical cans as mini instruction manuals tailored specifically for safeguarding your well-being—they often mention wearing protective gear because nobody looks good in ‘hospital chic’.
Besides personal harm, think bigger picture: improper disposal techniques after scraping off that pesky paint could introduce harmful elements back into Mother Nature’s lap—and she didn’t ask for them. So while planning how best to remove wall coverings may seem tedious compared to picking out new color swatches, consider safety steps as non-negotiable prerequisites before transforming those walls.
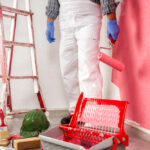
Preparing Your Workspace for Paint Stripping
Picture this: you’re ready to tackle that old, chipped paint on your walls. But before the transformation begins, a little prep work is in order. Think of it like setting up a stage for a rock concert—safety first, then let the show begin.
Ventilating Your Space
The fumes from stripping paint are not only unpleasant but can be harmful too. So make sure your workspace breathes easier than an athlete after marathon training. Open windows and use fans to create a cross-breeze; this will whisk away any toxic air faster than you can say “fresh coat.” And if ventilation feels about as effective as trying to empty a pool with a teaspoon, consider adding air purifiers.
Covering Up Like You’re Avoiding Paparazzi
Your furniture didn’t sign up for this makeover session—it prefers to stay clean and pristine. Drape everything with drop cloths or plastic sheeting as if hiding them from eager cameras at a red carpet event.
Banishing Sparks and Flames
We all know sparks can fly when chemistry is right—but not when dealing with flammable substances. Keep anything that could ignite quicker than gossip—a matchbook, candles (yes even those fancy scented ones), or an innocent-looking light switch—at bay during your project.
By taking these steps seriously, you set yourself up for success without turning your DIY project into some kind of reality TV drama where everything goes wrong. Safety might seem about as thrilling as watching paint dry but think of it this way: better safe now than sorry later.
Choosing the Right Personal Protective Equipment (PPE)
When you’re stripping wall paint, it’s like going into battle against a tiny, invisible army. You wouldn’t charge in without armor, right? That’s where personal protective equipment (PPE) comes into play. It’s your first line of defense against the chemical warfare waged by old paint.
The Must-Have PPE Arsenal
Your essential gear includes a high-quality respirator—not just any dust mask—to keep those nasty fumes and particles out of your lungs. Think about getting one with an N95 or higher rating; this is serious business after all. Next up are gloves that can take a beating from chemicals without letting them through to your skin—nitrile gloves are real champs here.
Eyes are precious, so don’t skimp on goggles that seal well around the edges. And for clothing? Coveralls might not win any fashion awards but they’ll save your everyday wear from becoming modern art pieces speckled with ancient paint.
Navigating Chemical Hazards
Now let’s talk strippers—and I mean the kind you use on walls. These aren’t friendly concoctions; we’re dealing with some hardcore substances designed to break down stubborn layers of color history plastered over years or even decades onto surfaces.
Browse labels as if you were investigating fine print in a shady contract because what lurks within these solutions isn’t always clear at first glance. Arm yourself with knowledge about active ingredients and get ready for action only once you’ve got all the info locked down tight.
Picking Gloves Like A Pro
Gloves come next and picking them is more than an eeny-meeny-miny-moe affair: consider material compatibility carefully since different chemicals interact variably across various glove materials. Here’s where being picky pays off—choose wisely based on what products you’ll be handling to prevent accidental hand-to-chemical combat scenarios.
Remember folks, dressing up in full PPE may feel like suiting up for space travel when all you want is to give that living room wall a fresh start—but trust me, it beats having irritated skin or worse health issues later down the road. So suit up smartly—it’s worth every second spent securing safety before taking off on this DIY mission.
Safe Use of Chemical Paint Strippers
Chemical paint strippers can feel like a necessary evil in the world of DIY. They’re tough on layers of old paint but equally harsh on human skin and lungs if mishandled. So, it’s critical to handle these chemical concoctions with care to avoid turning your renovation project into a horror story.
Read Those Labels Like Your Project Depends On It
The first rule of Fight Club and using chemical strippers? Don’t talk about Fight Club—and always read the label. But seriously, labels give you the lowdown on what you’re dealing with. Safer Choice standards by EPA are there for a reason: they tell you how gnarly those chemicals really are.
Dive deep into that fine print to understand which gloves will save your manicure from certain destruction or whether you need a respirator that makes Darth Vader’s mask seem amateurish. Knowledge is power here—power over potentially nasty ingredients like methylene chloride that could gatecrash your health party uninvited.
Safety Gear Up.
You wouldn’t go into battle without armor; don’t tackle stripping paint without gearing up first. A trusty respirator keeps toxic fumes at bay while gloves act as loyal knights guarding against chemical burns.
Goggles aren’t just for mad scientists—they keep your peepers safe when chemicals start splashing around like an excited puppy at bath time.
The Artful Application: Less Is More
Paste it on too thick, and you might find yourself in sticky situations—not only wasting product but also creating hazardous waste faster than villains create havoc in superhero movies.
Aim for even coverage using tools designed for this very purpose, keeping application smooth so airflow can do its thing and prevent any volatile compounds from becoming indoor clouds no one enjoys breathing.
Moral of the story? Treat chemical paint strippers with the respect they demand—suit up properly, read instructions carefully, apply wisely—and watch them work their magic safely from afar (well-ventilated area assumed).
Alternatives to Chemical Paint Strippers
So, you’ve got an old paint job staring back at you and it’s begging for a refresh. But hold up—before you reach for that harsh chemical stripper, know there are other ways to tackle the task without turning your space into a hazard zone.
Feeling the Heat with Heat Guns
Gone are the days when chemical strippers were your only option. Enter the heat gun—a tool as straightforward as its name suggests. It blasts hot air onto painted surfaces, making paint bubble up and peel away like sunburnt skin after too much beach time. Just remember: patience is key because rushing can scorch wood or release toxic fumes if lead-based paints are involved.
The beauty of this method? You’re avoiding those nasty chemicals altogether. However, keep in mind that using a heat gun requires some practice to avoid damaging underlying surfaces—or worse, setting something on fire accidentally.
Infrared Paint Removal Systems: A Sci-Fi Solution?
If we’re talking high-tech alternatives infrared paint removal systems, might seem straight out of science fiction but trust me; they exist in real life. These gizmos emit infrared rays that loosen paint bonds from underneath so you can scrape off layers easily and without harmful dust clouds.
This approach tends to be gentler than its heated counterpart since it operates at lower temperatures—reducing fire risks and preserving details on historic trims or moldings which deserve TLC rather than brute force stripping techniques.
But let’s not sugarcoat things—even these friendlier methods come with their cons like cost implications or availability issues compared to traditional solutions. Yet they often pay off by offering peace of mind through safer processes especially when DIY projects call for them.
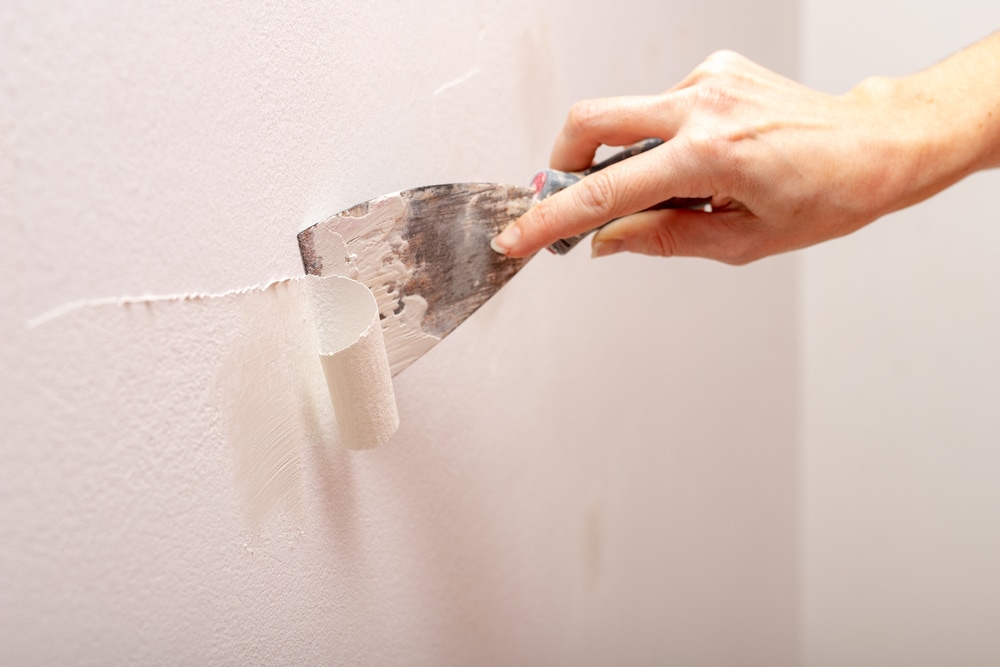
Sanding Without Tears (or Too Much Dust)
Last but not least, sanding may take elbow grease but paired with proper ventilation and PPE (that’s personal protective equipment), it becomes less tear-jerking over fears of airborne toxins swirling around while you work your way down to bare wood or plaster perfection. Sure—it’s dusty business even with electric sanders hooked up to vacuum attachments designed specifically for minimizing messes during operation…
Proper Disposal of Paint Waste
When the last stroke dries, and your walls gleam with fresh color, you’re left with a not-so-pretty souvenir: paint waste. Like leftovers after a feast, it’s what remains once the fun part is over. But before you chuck those cans in the trash or pour that murky water down the drain, let’s talk about doing right by Mother Nature—and staying on good terms with local regulations.
Navigating Local Regulations for Paint Disposal
You wouldn’t toss an old TV into your weekly garbage pickup without checking if it’s allowed; the same goes for paint. Every city has its own rules and regs, so make sure to give them a look first. Many areas have specific drop-off days or facilities dedicated to hazardous waste—because yes, that leftover latex can be hazardous.
Not all paints are created equal either. Oil-based varieties are particularly finicky and usually require special disposal methods compared to their water-based cousins. So check those labels twice—it could save you from fines or worse yet, harming our planet.
Packaging Up Your Paint Waste Properly
Gearing up for disposal day? Make sure your containers aren’t leaking any secrets—or toxic chemicals—for that matter. Seal lids tightly because spills spell trouble (and mess). If you’ve got mostly empty cans lingering around like party guests who overstayed their welcome, consider adding some cat litter or sand to solidify any remaining liquid before saying goodbye.
If we’re talking about more than just drips here—like half-full buckets—a visit to your local recycling center might be due. They often accept larger quantities but do call ahead because nobody likes surprise visitors bearing gallons of gooey gifts.
Tips for Reducing Paint Waste From The Get-Go
We love it when things come full circle—especially when it involves reducing waste altogether. When planning your next masterpiece of home improvement remember this: buy only what you need—that way there’s less hassle later on dealing with excess leftovers looking for homes outside yours.
Better still? Share extra paint with friends doing similar projects or donate it to community centers where it can help brighten someone else’s world too—that’s painting forward at its best.
Emergency Procedures for Accidental Exposure
If you find yourself in a sticky situation with paint stripper chemicals, don’t panic. Quick thinking and immediate action can make all the difference. Here’s what to do if those nasty chemicals get up close and personal.
Chemical Splashes on Skin
Did you run into an oozy enemy? If chemical strippers kiss your skin, wash it off fast. Scoot over to a sink or hose and let cool water run over the affected area for at least 15 minutes. While you’re at it, remove any contaminated clothing or jewelry to prevent further skin exposure.
After rinsing, covering the area with a clean cloth can help protect it until you seek medical attention—because yes, that’s your next step. Reach out to Poison Control or head straight to the emergency room so professionals can give their verdict on how serious things are.
Inhaled Fumes Knock You Off Your Feet?
Breathing in too much of those wicked fumes? First things first: fresh air is your best friend here. Get yourself outdoors pronto or open all windows wide—if possible—and crank up fans to clear out those bad vibes (read: toxic fumes).
Oxygen is key when your lungs protest against chemical invaders. Deep breaths will help settle them down while someone dials Poison Control for advice because they’ve got smart people who know exactly what kind of trouble these chemicals bring along.
A Chemical Tango With Your Eyes
Splash dance gone wrong? If paint remover gets into your peepers, blink rapidly under lukewarm running water from a faucet or shower for about 15 minutes—you want none of that stuff sticking around. Your eyes are precious; treat them like VIPs after such an ordeal by visiting an eye doctor ASAP even if everything seems okay post-rinse—the doc needs to ensure there’s no lingering harm done by those harsh substances.
Remember this isn’t just advice—it comes from dealing with countless splatters and spills firsthand. So take care and always put safety first when stripping walls back home—or anywhere else really.
Maintaining Safety Throughout the Project
When you’re in the thick of stripping paint off walls, it’s like being a goalie during penalty kicks—you’ve got to stay sharp and ready at all times. Keeping your safety game strong from start to finish is not just smart; it’s crucial.
Vigilance with Ventilation
Sure, cracking a window might seem good enough for airing out those fumes, but that’s playing rookie league. Do you want pro-level air quality control? Use fans strategically placed for cross-ventilation and consider an air purifier as backup defense against airborne villains.
If the chemicals get too feisty or dust starts throwing punches above its weight class, take a breather—step outside regularly. Fresh air isn’t just great for brainstorming; it keeps your lungs clear of the indoor fray.
PPE: Your Paint Stripping Armor
Gloves are more than a fashion statement—they’re your trusty sidekicks shielding you from chemical burns and unwanted splatters. Don’t forget about goggles either; they keep peepers safe when paint goes rogue. And remember—a respirator is your best friend in this toxic relationship between old paint and fresh beginnings.
Dressed head-to-toe in protective gear might make you feel like an astronaut on Earth—but hey, better safe than sorry when navigating through hazardous territory.
The Break Game Plan
You wouldn’t run a marathon without hydration breaks, right? The same rules apply here—regular timeouts are key players in maintaining focus and avoiding fatigue-related fouls.
And let’s talk snacks—the unsung heroes keeping morale high amidst grueling work sessions. Keep some fuel handy because nobody performs well on empty—and we’re not talking about cars now.
Remember that while ripping away layers of history can be oddly satisfying—it’s also serious business fraught with sneaky hazards lurking around each corner. Stay alert, and stick to these tactics religiously because cutting corners could mean getting cut by them instead.
FAQs in Relation to Safety Steps for Stripping Wall Paint
What precautions should you take when stripping paint?
Dress in PPE, ventilate your space well and steer clear of open flames. Always read labels before using chemical strippers.
How do you safely strip paint?
Use low-toxicity products or heat tools. Keep the area aired out and chuck waste according to local rules.
What is the right process for paint stripping?
Cover up, slap on a respirator, lay down drop cloths, and gently apply your chosen stripper. Take it slow.
How do you strip paint off walls?
Pick your method—chemicals or heat—and go at it with care. Mind the fumes and junk any leftovers properly.
Wrapping this up, safety steps for stripping wall paint are your project’s backbone. You’ve learned the ropes—from dodging toxic chemicals to dressing in protective gear. Remember ventilation and that preparation is king.
Dive into each layer with care; use goggles, gloves, and respirators without fail. Consider eco-friendly strippers or heat guns as safer paths.
Toss out waste by the book; keep nature clean. If accidents happen, stay calm and follow emergency procedures.
Maintain focus on safety from start to finish—your health and masterpiece depend on it. With these guidelines etched in mind, you’re ready to strip away with confidence.
The process of stripping wall paint requires careful attention to safety. Techniques like wet hand scraping, wearing resistant clothing and PPE, and thorough cleaning are crucial. Stellar Painting brings these best practices to every job in Aledo, Benbrook, and Chapel Creek, ensuring a safe, effective, and professional service. We believe in delivering high-quality workmanship and prioritizing the well-being of our clients and their homes. Trust us for all your painting needs.