The Steps to Painting a Front Door
How to Paint a Front Door: A Step-by-Step Guide
Painting your front door can be a delightful weekend project that significantly boosts your home’s curb appeal.
It’s more than choosing a paintbrush and a hue; it’s about finding the perfect color and type of paint that will withstand the weather while welcoming guests into your home.
Whether it’s sleek black door paint for a touch of elegance or vibrant red door paint for a splash of cheer, the right shade makes all the difference.
I’ll guide you through the maze of choices and techniques, from oil-based options best suited for wood doors to latex formulations perfect for metal.
Keep reading for a comprehensive walkthrough that will transform your entrance into a statement piece.
Deciding on the Best Time to Paint Your Front Door
Embarking on the journey of painting a front door is not just about splashing on a color that enhances curb appeal.
It’s about timing and conditions, too.
Picking the right day can make a world of difference in the outcome of your project.
Naturally, temperature and humidity play pivotal roles in how your selected hue, whether a vibrant red door paint or an understated black door paint, adheres and dries.
It’s crucial to consider the drying times for primer and exterior door paint, ensuring they have ample time to set between coats.
This initial phase sets the tone for the entire project, so understanding these elements before the paintbrush touches the wood or metal door is fundamental.
Identify the Ideal Weather Conditions for Painting
When I set out to paint a front door, the weather forecast became my closest ally. I aim to find a day with low humidity and mild temperatures; too much moisture in the air can hinder paint from setting properly, and extreme heat might cause it to dry too quickly, leading to unsightly cracks or peels.
- Review the forecast for clear, dry days—ideally, with humidity levels below 50%.
- Target a temperature range between 50 to 75 degrees Fahrenheit for optimal drying conditions.
- Avoid painting under direct sunlight, which can cause the paint to blister or fade prematurely.
- Ensure there’s no rain expected within 24 hours after application to prevent washouts.
Understand the Importance of Temperature and Humidity
As I meticulously plan my door-painting endeavor, I’ve grown to recognize the pivotal role that temperature and humidity play in the equation. Sizzling summer days or the cold snap of winter can adversely affect your chosen door paint, be it a lustrous satin or an eggshell finish. In contrast, moderate conditions help achieve that flawless, enduring coat. Ignoring these factors could lead me to a disheartening sight of paint that neither flows nor settles as it should, marring the very allure of the entrance I aim to enhance.
- Timing is everything: paint adherence and drying are optimal when the thermometer reads kindly.
- Aim for a balance: weather not too hot or cold will make the layers bond wonderfully.
- Stay one step ahead: searching for that perfect weather window shields your hard work from premature wear.
Consider the Time Needed for Drying Between Coats
Patience becomes a virtue when balancing the art and science of painting a front door. Each layer, from the initial primer to the rich hue of Sherwin Williams exterior door paint, demands time to dry, accruing strength and smoothness before welcoming the next. Skimping on this waiting game can result in a finish that betrays my effort, so I meticulously allocate time for the paint to cure completely, ensuring a professional-grade appearance and longevity.
Choosing the Perfect Color for Your Front Door
Embarking on the transformation of my front door into a captivating entryway begins with selecting the perfect color.
What resonates most with me, you may wonder?
It’s the powerful statement a door color makes—a reflection of personality and style, creating a welcoming embrace and hinting to the world about who dwells within.
I weigh the psychological impact different hues have, not just in terms of aesthetics but the feelings they evoke.
Aligning the door’s color with the existing palette of my home is another critical consideration; does it harmonize or stand assertively in contrast?
My trusty paintbrush will kiss the wood or metal once I’ve tested potential shades under different lighting conditions, ensuring the color that charmed me in the store maintains its allure in the natural glow of dawn and the amber twilight.
This process isn’t just about the brush strokes; it’s an artful narrative told in color.
Explore Color Psychology and Its Impact
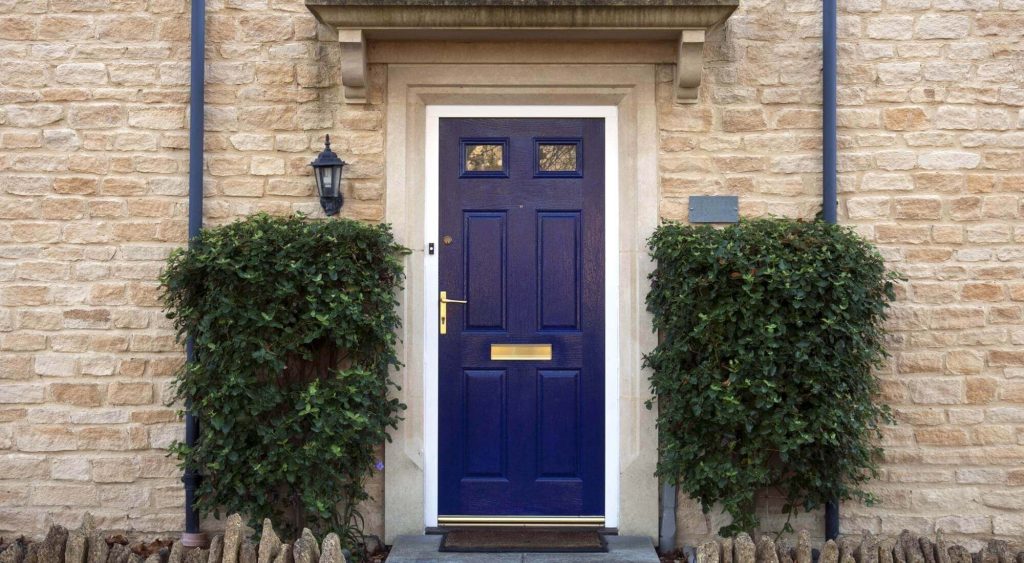
Staring at swatches of outdoor door paint, I’ve come to appreciate the transformative power of color psychology on home exteriors. A dash of red door paint may impart energy and invite guests with open arms, while the sophistication of black door paint conveys elegance and an air of mystery. My choice of hue isn’t simply a matter of personal taste; it’s a strategic decision that shapes the emotional ambiance of my abode, from the curb to the foyer.
Match or Contrast With Your Home’s Existing Palette
In my quest to achieve outstanding curb appeal, I often find myself at a crossroads, deciding whether the door paint should be in harmony with my home’s existing colors or stand out as a bold statement. Settling on a hue that complements the brick, siding, or trimming can create a cohesive look that soothes the eye, while opting for a contrasting color can be a daring move that marks my entrance with a distinctive flare, inviting admiration and curiosity alike.
Test Paint Samples in Different Lighting
Before I commit to a quart of exterior door paint, I’ve learned the importance of observing my contenders in varying lights across the day. The color that looks flawless in the store’s fluorescent lighting may transform dramatically on my porch as the day wanes.
Selecting the Right Type of Paint for Your Door
Setting the stage for a freshly painted door requires more than grabbing a random can of paint from the shelf.
It’s about making informed decisions that will withstand time and weather.
Whether I’m stroking a paintbrush loaded with oil-based paint ideal for its robust finish or opting for a water-based latex paint known for its quick drying time and easy cleanup, understanding their unique benefits is imperative.
But, the decision-making continues.
The finish I choose—be it a glossy sheen that repels dirt or a low-luster matte that hides imperfections—can completely alter the final look of my door.
This deep dive into the nuances of paint types also leads me to scrutinize their durability and resistance to fading.
After all, I want to ensure that the door withstands the rigors of sunshine and rain and maintains its freshly painted charm as long as possible.
Differences Between Oil-Based and Water-Based Paints
Deliberating between oil-based and latex paints for my front door isn’t an arbitrary choice; it hinges on specifics of durability and workability. Oil-based paints are renowned for their resilience to wear and robust finish, making them ideal for high-traffic areas. Latex options offer a quicker drying time and simpler water-based cleanup, yet might need more frequent touch-ups over time.
- Assess the door’s exposure to elements: high-traffic doors benefit from the toughness of oil-based paints.
- Consider the ease of future maintenance: latex paints, being less toxic and more accessible to clean, facilitate swift touch-ups.
- The balance between aesthetic finish and practicality: oil paints might be yellow over time but provide a hard, protective layer, while latex paints remain vivid but are softer.
The Importance of Finish: Gloss, Semi-Gloss, or Matte?
Deciding between gloss, semi-gloss, and matte finishes is pivotal to your project’s success, mainly influencing appearance and maintenance. A high-gloss finish, for instance, offers a reflective sheen that’s durable and easy to clean, often the go-to for an entry that demands attention and withstands frequent cleaning. On the other hand, matte finishes exude a more subdued, contemporary elegance but can be more forgiving, where brush strokes and imperfections might detract from an otherwise striking result.
Evaluating Durability and Fade Resistance
In my pursuit of perfection, evaluating the durability and fade resistance of the paint for my front door is a particular concern. I aim for a product that delivers longevity, withstanding the daily exposure to sun, rain, and the occasional scuff. A steadfast finish that repels the elements and maintains its hue without succumbing to fading or cracking ensures my door remains a source of pride year after year.
- Identify paints with UV protection to prevent fading from sunlight exposure.
- Look for formulations resistant to harsh weather, repelling rain and rust.
- Opt for a paint that promises a hard-wearing finish, capable of handling everyday wear and tear.
Essential Prep Work Before Painting the Front Door
As I approach the critical stage of priming and painting my front door, it’s clear that meticulous preparation underpins the entire process.
Dedicated prep work not only facilitates a smoother application but also contributes massively to the durability and aesthetics of the final outcome.
From the moment I tenderly run sandpaper over the surface, feeling the grain beneath my fingers, to the careful application of primer that sets the stage for a rich and even color, it becomes evident that this isn’t just about applying paint; it’s a craft.
Before I even think about opening my chosen quart of Sherwin Williams exterior door paint, I’ve got cleaning, sanding, priming, and masking to attend to—ensuring every nook and cranny of my door stands ready to shine.
Cleaning and Sanding the Door Surface
Embarking on the meticulous journey of prepping my front door for a new coat of paint, I meticulously clean the surface. A combination of soapy water and a gentle scrub using a sponge removes the grime and dirt buildup, while a bit of rubbing alcohol works wonders for more stubborn spots. After the cleaning ritual, I fervently sand down the door, using fine-grit sandpaper to create a smooth base to help the primer and paint adhere firmly, transforming my door into a canvas awaiting renewal.
Applying Primer: When and Why It Is Necessary
Primer application is pivotal: it serves as the undercoat that ensures a robust bond between the wood or metal and the topcoat of paint. Without it, I might find myself confronting a finish that lacks durability, struggling to adhere to the surface, or displaying the old paint or stains beneath. It becomes the foundation that promotes the longevity and vibrancy of the door’s new coat, a necessity for any discerning painter aiming for excellence.
- You should begin by selecting a compatible primer for your door material, whether wood, metal, fiberglass, or steel.
- Apply a thorough coat of primer to prevent previous colors and stains from bleeding through.
- Allow ample time for the primer to dry completely before moving on to paint—the wait is crucial to achieving a pristine finish.
Masking Off Hardware and Surrounding Areas
Attention to detail separates a good paint job from a great one, and masking off hardware and surrounding areas is no exception. Once the door surface is primed and ready, I delicately tape around the door handle, lock, and hinges, protecting them from unintended paint splatters. The adjacent brick or siding and the threshold receive the same treatment, ensuring the paint goes only where I intend it to.
- Cover the door handle, hinges, and lock with painter’s tape for protection.
- Shield nearby areas such as brick, glass, or siding with plastic or painter’s foam.
- Place tape along the edges of the door to create crisp, clean lines where it meets the frame.
Step-by-Step Guide to Painting the Front Door
After diligent preparations of cleaning, sanding, and priming the door, I reached the most transformative point—the painting itself.
This stage buzzes with anticipation as I’m ready to apply the first coat of paint, meticulously laying the foundation for what will soon be a revivified entryway.
With my paintbrush, roller, or sprayer in hand, I’m acutely aware of the techniques required to avoid drips and imperfections, ensuring a smooth and even application.
Patience and precision are my companions as I consider the number of coats necessary for a fully opaque and vibrant finish.
Each additional layer promises added depth and protection, culminating in a front door that’s visually striking and enduringly coated against the elements.
During this painting phase, it’s here where the choices of paint, color, and care coalesce into the visible expression of my home’s character.
Applying the First Coat of Paint
With my brush ready, I approach the first coat with excitement and focus. It’s the pivotal moment where my prep work pays off, allowing smooth, even strokes that set the foundation for a durable, uniform color. Ensuring not to overload the paintbrush, I begin with the door’s details before progressing to broader surfaces, each brushstroke methodically overlapping the last for a coherent finish.
Tips for Avoiding Drips and Brush Marks
Adeptly wielding my paintbrush, I’ve realized the importance of maintaining a steady hand and the correct amount of paint to avoid unsightly drips and brush marks. I ensure my strokes are even and controlled by dipping only the tip of the brush and wiping off any excess on the side of the can. I take my time with each pass, firmly yet gracefully dragging the brush along the contours of the door, a technique that steadfastly guards against the dreaded blemishes that can mar an otherwise exquisite finish.
Applying Additional Coats for a Solid Finish
As the rich color of the initial paint layer sets the aesthetic tone, I remain vigilant, recognizing that a singular coat rarely suffices: additional layers are imperative for presenting a depth and richness that truly punctuate the door’s presence. With each subsequent coat, I reinforce the color’s cohesive saturation and fortify the surface against the daily wear handed out by sun, wind, and rain.
| Step | Action | Drying Time | Notes |
|---|---|---|---|
| 1 | Apply the first coat of paint | Depending on the paint type and weather conditions | Ensure even coverage |
| 2 | Assess for uniformity | Before next coat | Check for drips or thin areas |
| 3 | Apply second coat | As per manufacturer’s recommendation | Achieve solid color and finish |
| 4 | Examine and touch up | After the final coat dries | Perfect the edges and details |
How to Paint a Front Door Without Removing It
Approaching and refreshing my front door while it remains on its hinges presents a unique set of challenges and considerations.
My focus sharpens as I envision a steady door, undisturbed by breezes or the household’s bustle, ensuring each brush stroke is deliberate and flawless.
With newspapers or drop cloths laid out, the ground and my door’s hardware are shielded from splashes and spills.
I tread carefully as I navigate around hinges and handles, my attention divided between protecting the door’s functional elements and achieving an all-encompassing, vibrant coat.
In this intricate dance of precision and protection, my goal remains steadfast: a beautifully painted door that is a testament to my regard for minor details.
Securing the Door to Prevent Movement
While preparing to paint my door, I must ensure stability so my precision work is manageable by unexpected shifts. I find a way to brace the door firmly, which makes all the difference: using sawhorses to prop it open or a wedge to stop gentle swaying caused by passing air. Once secure, I can focus on the task at hand, moving my brush along the contours of the door with confidence, untroubled by sudden movements.
- Start propping the door firmly open with sturdy sawhorses or a weighted stopper.
- Check to confirm no play or swing in the door might disrupt paint application.
- Continue the painting process with the assurance that the door’s stability won’t compromise the quality of your work.
Covering the Ground and Hardware
As I approach the painting process with meticulous care, protecting my floors and door fixtures is essential. I lay down drop cloths to catch any errant paint drops, ensuring they extend beyond my work area to safeguard the garage or patio beneath. A mix of painter’s tape and plastic sheeting for the hardware ensures that every door handle, hinge, and lock remains free from paint, preserving their functionality and appearance.
Working Around Hinges and Handles
As I delicately wield my putty knife and tape to mask off each hinge’s elegant curve and the door handle’s sculpted shape, a sense of precision engulfs me. I am reminded that these functional pieces, though minor in the grand canvas of the door, require a painter’s gentle touch. In these fine details, my commitment to excellence is revealed, protecting them vigilantly to ensure they emerge unscathed as if they, too, were masked by an unseen craftsman’s hand.
The Final Touches: Reassembling and Curing Time
Stepping back to admire a freshly painted door offers a sense of accomplishment, but my task is only complete with attention to the final details that will truly finish the job.
Reattaching hardware, allowing the paint to cure, and employing maintenance tips all ensure that my hard work endures.
This part of the process, though subtler than the transformational brushstrokes, secures the refreshed door’s lasting impact as a beacon of curb appeal and testament to my careful craftsmanship.
Reattaching Hardware After Painting
As the luster of my newly painted door begins to reveal itself, I carefully reattach the hardware with a steady hand, replacing each door handle, hinge, and lock with precision. The familiar click and clasp of these elements being secured into place is a satisfying finale to the project, marking the transition from a freshly painted door to one fully functional and ready to welcome guests with style.
Curing Time: How Long Before Closing the Door?
Once the symphony of painting draws to a close, a significant pause is necessary to honor the paint’s curing time, which tests my patience yet secures my work’s permanence. It’s tempting to close the door and admire it from afar, but wisdom instructs me to wait for the paint to dry to the touch and then some, as closing the door too soon might result in the paint sticking or an imperfect finish. The manufacturer’s guidelines are my beacon here, often directing me to leave the door open for at least 24-48 hours, safeguarding the fruit of my labor from untimely marring.
- Resist the urge to close the door immediately after painting; consult the paint instructions carefully.
- Allow for paint to dry to the touch, plus additional time, as indicated, to prevent sticking or imperfections.
- Follow the 24-48 hour rule as a general benchmark for curing, adjusting as needed for factors like humidity and temperature.
Maintenance Tips to Keep Your Door Looking Fresh
A diligent routine is essential to keeping my front door looking fresh and vibrant through the seasons: periodic cleaning, immediate touch-ups for chips or scratches, and a yearly inspection for signs of wear are my go-to maintenance strategies.
| Task | Action | Frequency |
|---|---|---|
| Cleaning | Gently wash with mild detergent and water | Every 3-6 months or as needed |
| Touch-Ups | Apply small amounts of paint to chips or scratches | Immediately upon noticing damage |
| Inspection | Check for fading, peeling, or other wear | Annually, ideally during mild weather |
Additional Ideas to Enhance Your Front Door’s Appeal
Once the painting is complete and the color of my front door vividly stands out, I move toward personalizing the entry to reflect my home’s character truly.
I consider adding decorative elements like stylish house numbers or an elegant door knocker, all of which serve as jewelry to further enhance the door’s newfound charm.
Next on my list is picking complementary hardware finishes, from the rustic appeal of antique bronze to the modern sheen of brushed nickel, to ensure the replacement hardware beautifully complements the door’s color.
Lastly, I deliberately choose outdoor lighting fixtures that illuminate the entrance at night and spotlight the door’s fresh coat of paint, turning it into a striking focal point that warmly greets guests and passersby alike.
Adding Decorative Elements Like House Numbers or a Knocker
As the final layer of paint dries, turning my attention to the finer details feels like curating the last touches on a masterpiece. Adorning my front door with chic, visible house numbers or a statement-making door knocker adds a layer of sophistication. It personalizes the space, hinting at the meticulous thought and care that resides within it.
| Action | Consideration | Impact |
|---|---|---|
| Choose house numbers | Style and visibility | Enhance functionality and design appeal |
| Select a door knocker | Finish and weight | Offer a tasteful greeting to guests |
Choosing Complementary Hardware Finishes
Once my door receives its final coat, there’s nothing like the magic of complementary hardware finishes to elevate its impact. Exploring options that resonate with the door’s color and the home’s architectural style, I always opt for hardware that blends seamlessly, contributing to a cohesive look without overshadowing the door’s fresh paint. From the sleek subtlety of satin nickel to the warm depth of oiled bronze, the right finish enhances the door’s aesthetic and echoes the care poured into every brushstroke.
Selecting Outdoor Lighting to Showcase Your Newly Painted Door
Choosing the proper outdoor lighting to feature my newly painted door is about striking the perfect balance between form and function. The lighting should not only illuminate the doorway but also accentuate the door’s color, finish, and the nuances of the paint job after dusk has settled in.
- Consider fixture designs that complement the door’s architecture and your home’s style.
- Opt for lighting that casts enough lumens to enhance security while accenting the door’s best features.
- Finalize with bulbs that offer a warm temperature for an inviting glow or cooler temperatures for a crisp, modern effect.
Conclusion
The success of painting a front door hinges on impeccable timing, meticulous preparations, and the right choice of paint and color to bolster curb appeal.
Proper weather conditions and patient drying times between coats ensure the paint adheres beautifully and lasts.
The fine art of application involves carefully executed brushwork to avoid drips and achieve a smooth, solid finish.
The resulting front door is a testament to thoughtful craftsmanship by attending to these crucial steps, inviting admiration and adding character to any home.
Painting your front door is an accessible project that can significantly enhance your home’s curb appeal. By following these detailed steps, you’ll achieve a professional-looking finish. Trust Stellar Painting to guide you through each phase, ensuring your doorway becomes a welcoming, vibrant entrance that reflects your style.